

Hi everyone, and welcome to my first development tutorial for MSFS. In this tutorial, I'll explain my workflow for how I create PBR ground markings for my sceneries and some general explanations of the texturing process.
This tutorial assumes you have basic knowledge of asset creation in Blender for MSFS, including exporting to GLTF, basic photoshop/gimp skills, and familiarity with Substance Painter texturing, including exporting for MSFS.
Needed Programs
For this tutorial, you will need:
- Adobe Photoshop or Gimp (I will be using photoshop)
- Adobe Substance Painter
- Blender
- A project set up in MSFS with a model lib.
Creating the Texture Map
Document Setup
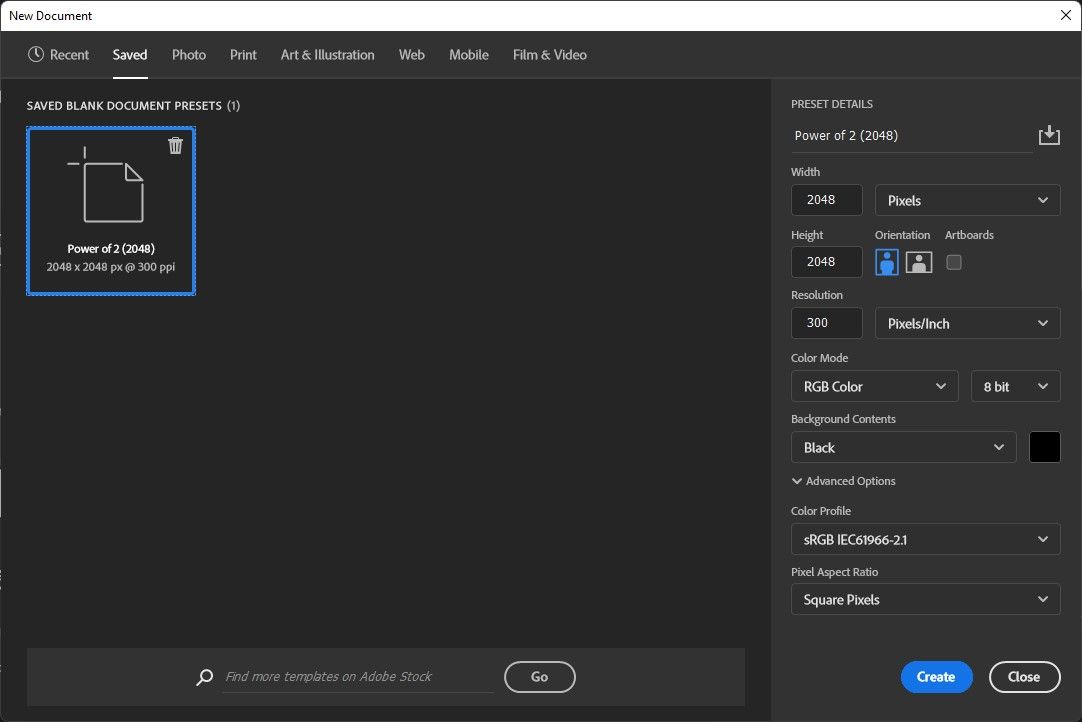
The first thing you'll want to do is to create a new photoshop/gimp document, the width and height should be the same power of 2 (so 512, 1024, 2048, or 4096), the color mode should be 8-bit, and the background color should be black or white (you'll change it later). I'll be using photoshop, but it shouldn't be challenging to follow along in GIMP.
Creating Markings and Lines
Then you'll want to create the shapes of your markings. Make them take up as much room as possible for greatest detail while still retaining enough space not to make UV mapping a hassle.
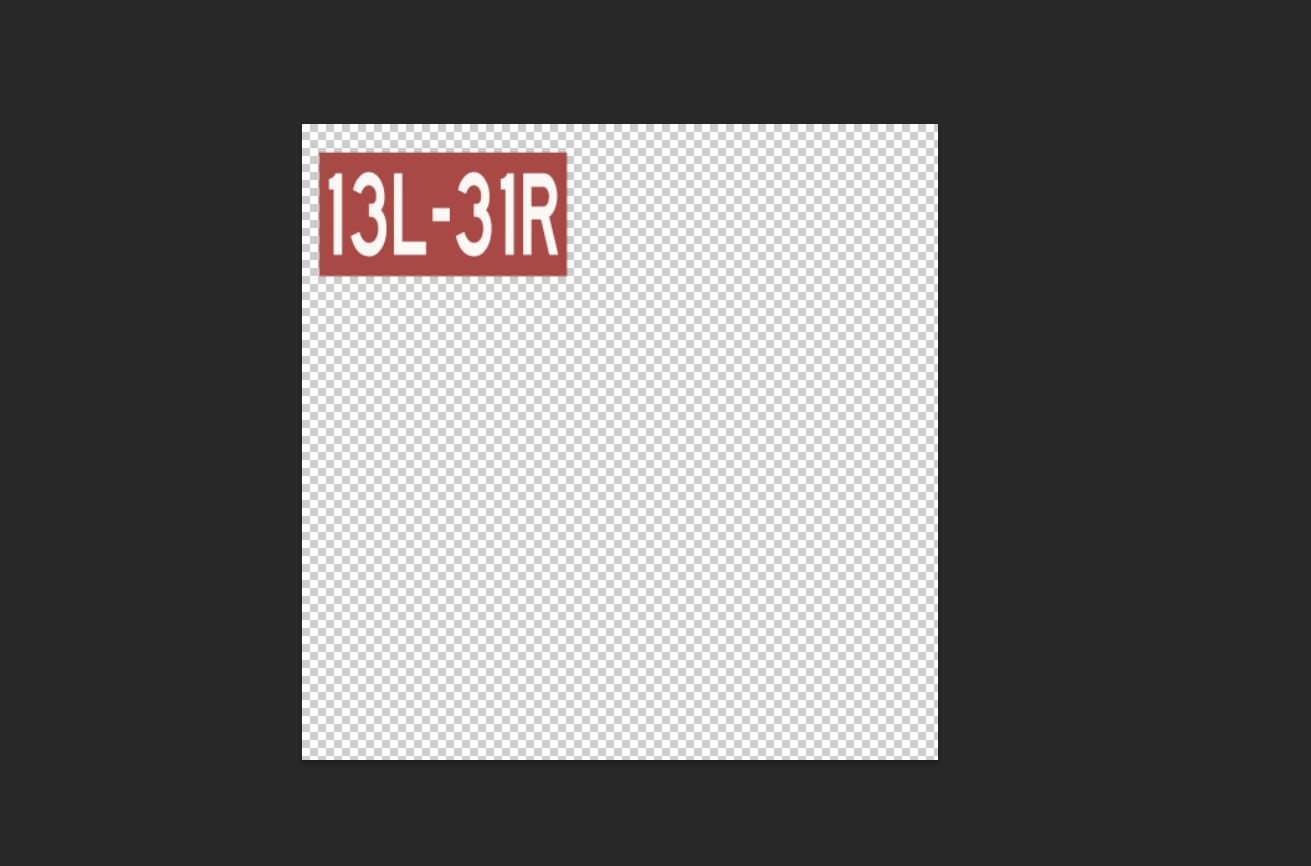
For lines, I usually ensure the line spans the full height of the document. However, if you use SDK-painted lines, you must put the lines in a specific spot and export the textures in a slightly different format.
When you create your markings, try to make them so it's easy to change the color on the fly. Note that any colors assigned to shapes won't carry over to Substance, so you should write down their hex codes if you want them as the final colors.
Exporting Masks of the Colors
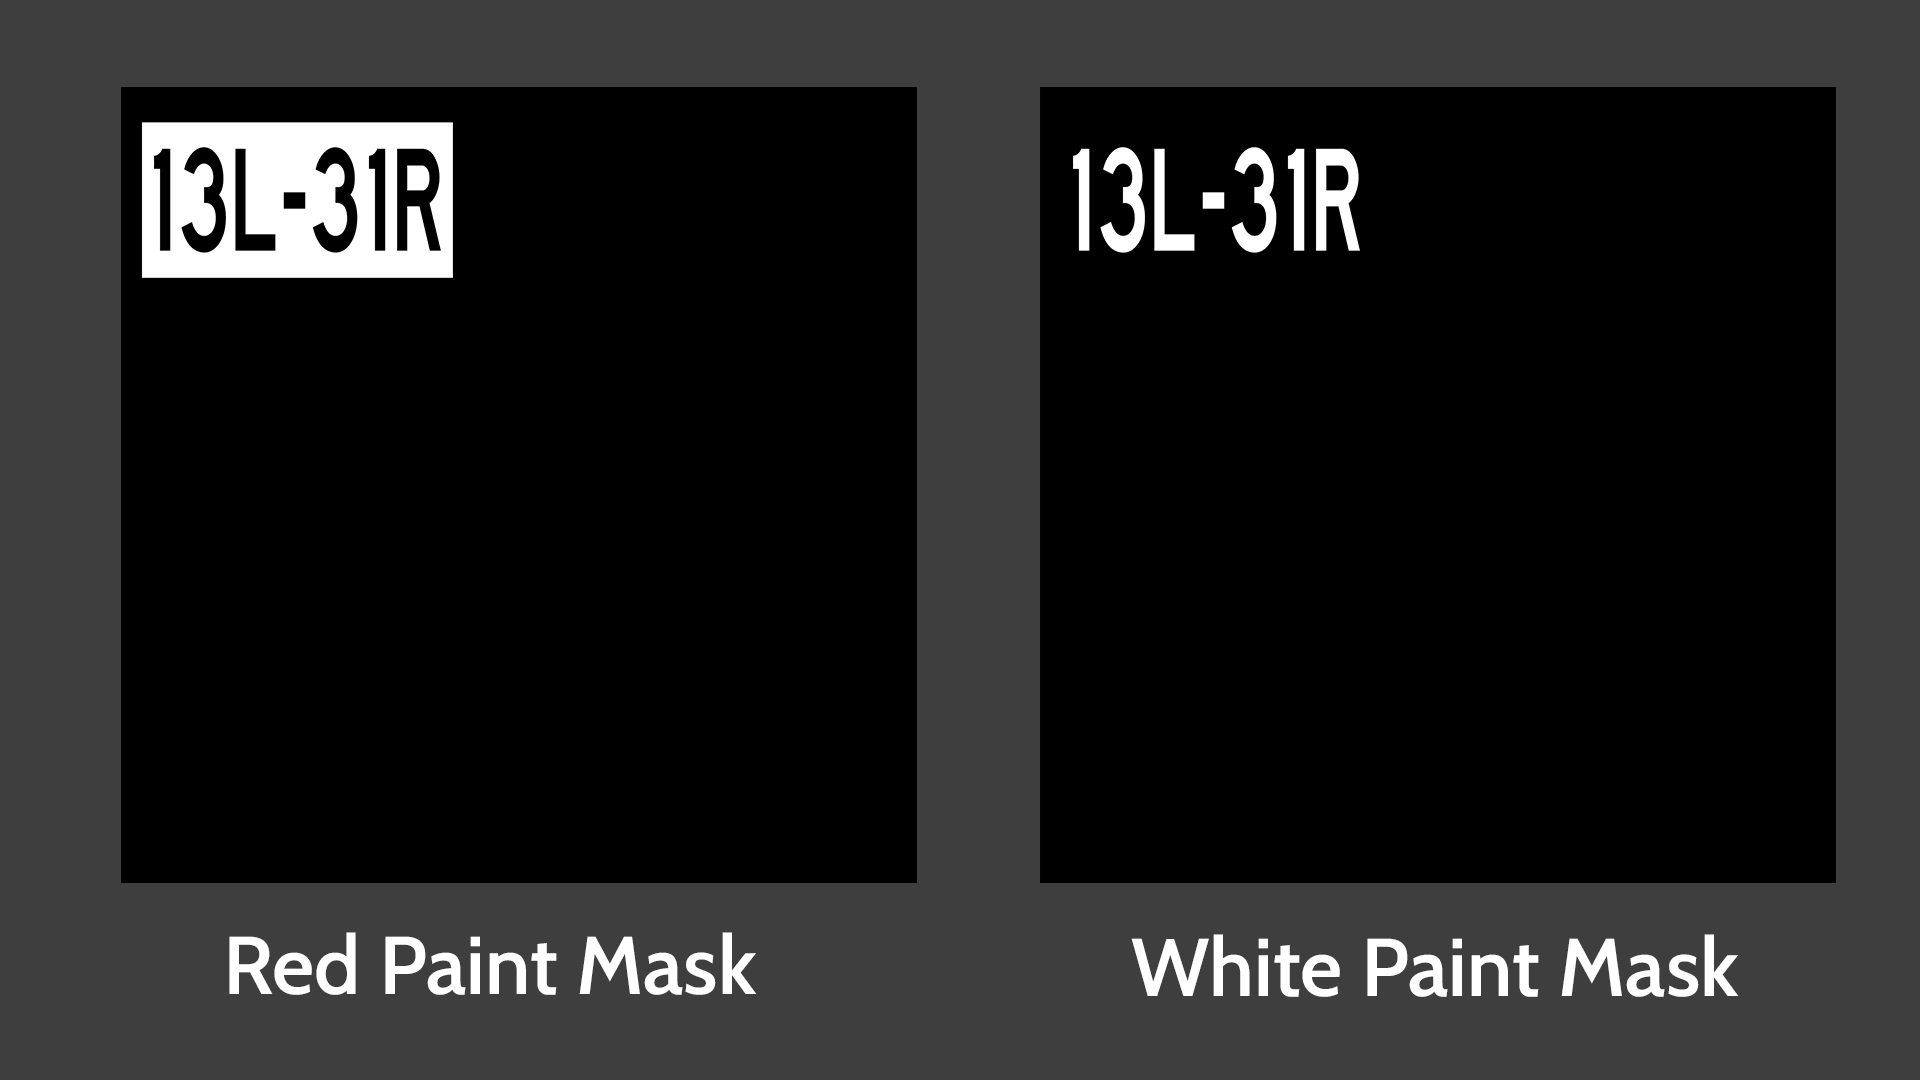
Once you have all the markings created, you'll want to turn each paint color into a grayscale mask.
For example, to make a mask for the red paint, I'll set all the red shapes to white, the shape stroke to black, the text over it to black, and the background layer to black. Then I'll export it to png. Then repeat the process with the other colors.
Once these masks are exported, save your document and open Substance Painter.
Adding the Textures in Substance Painter
Substance Painter Project Setup
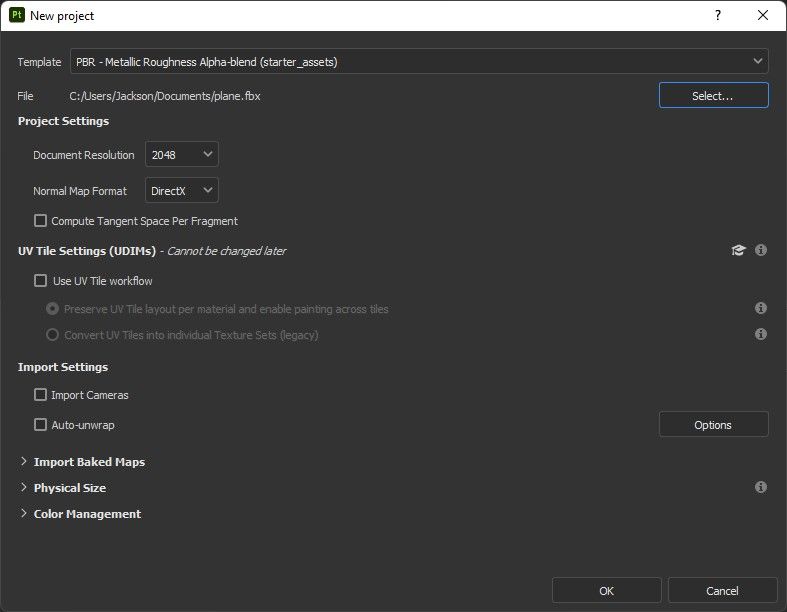
In Substance, create a new project. Make sure to choose "PBR - Metallic Roughness Alpha-blend (starter _assets)" as the template. For the mesh, you'll want to do a flat square plane. Or you can use this FBX file.
Finally, for the document size, it should match the power of two you picked when creating your photoshop/gimp document.
Import your Masks
Now, in the assets pane. Drag and drop the masks you exported earlier to the pane; another pane should pop up. Notice in the list of imports, to the right; it says "Undefined." Click where it says that and change each texture's type to "Alpha." Finally, you'll want to make sure you choose a place to import it to. Typically, I prefer the current session.

Press "Import", and you should see your masks pop up in the assets pane, but if you don't, search for them.
Texturing your Markings
Now comes the fun part.
First, create a new fill layer. In the properties for the layer, turn off every channel except the Opacity channel. Then scroll down, and slide the Opacity slider to the left so that the value is zero.
Now, create another fill layer. This layer will be one of your paint colors; for this tutorial, it'll be the red paint used for the markings.
You'll want to right-click on that layer you just created and press "Add a Black Mask." After you click, Substance will add a black square to the left of the thumbnail for that layer. Click on that black square so it's highlighted, then right-click again and choose "Add Fill." Under the layer, you should now see a fill. Click it, and drag and drop one of the masks you imported in the box that says grayscale in the properties pane. You should see the black square change to look like your mask.

Now click on the main thumbnail for the layer and repeat the process for each different paint color or size.
After you have added the masks and layers, this is like texturing any other object in Substance Painter, and explaining how to create materials is out of the tutorial's scope.
However, I do have some things that you should keep in mind:
- Make sure you have the opacity channel enabled for all layers. You can lower it slightly, but it must be enabled.
- Don't worry too much about height and normal channels. Normals are important, but you'll likely lose most of the normal details when placed in sim.
- Make sure all colors are what's known as PBR safe. Colors in real life are usually much lighter in tone than we remember. To quote the Substance Painter PBR guidelines:
For dark values, you should not go under 30-50 sRGB.The range for dark values could be more tolerant at 30 sRGB and stricter at 50 sRGB. For bright colors, you should not have any values that are higher than 240 sRGB
- Always add some grunge and dirt, and mess around with the roughness (which likely will be a separate tutorial in the future). Otherwise, your markings will not look realistic when in the sim.
Exporting
Finally, you will want to export your texture once you have finished coloring your lines.
When you export, it'll take each layer and combine it to create one texture for use in the sim. You should have a preset already to export to PBR for MSFS, but just in case, I'll upload it here.
Substance Painter Export Presets
Main Export Preset:
SDK Material Editor Preset (for Aprons and Painted Lines):
Once you're exported, save your project and close Substance Painter. Then, get ready to do some Blender(ing).
Blender and UV Mapping
First up, open a new project (or if you have a reference image set up, use that file).
Then, you'll want to create a plane or shape to put the marking on. The plane should be the exact size as in the sim.
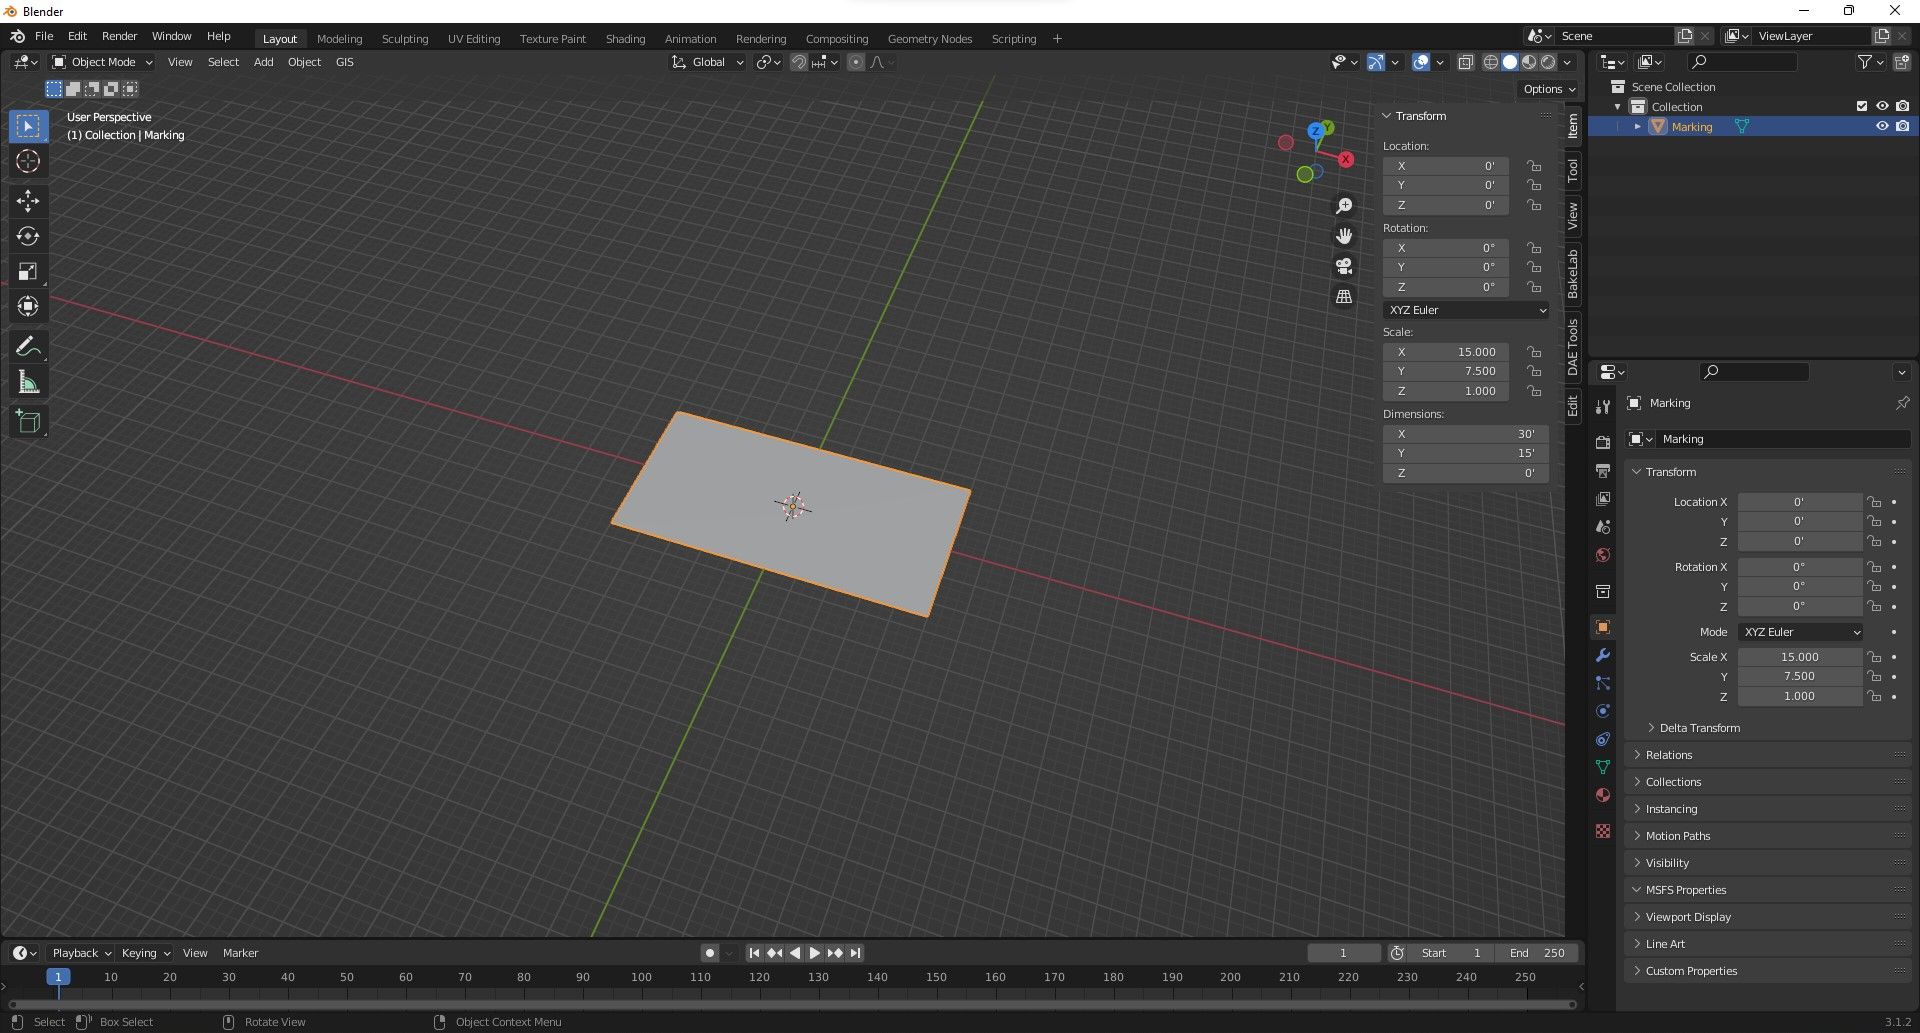
Now apply all transforms (CTRL + A) and go into edit mode, then add and assign a new MSFS texture with the albedo, comp, and normal maps we exported from Substance Painter to the face.
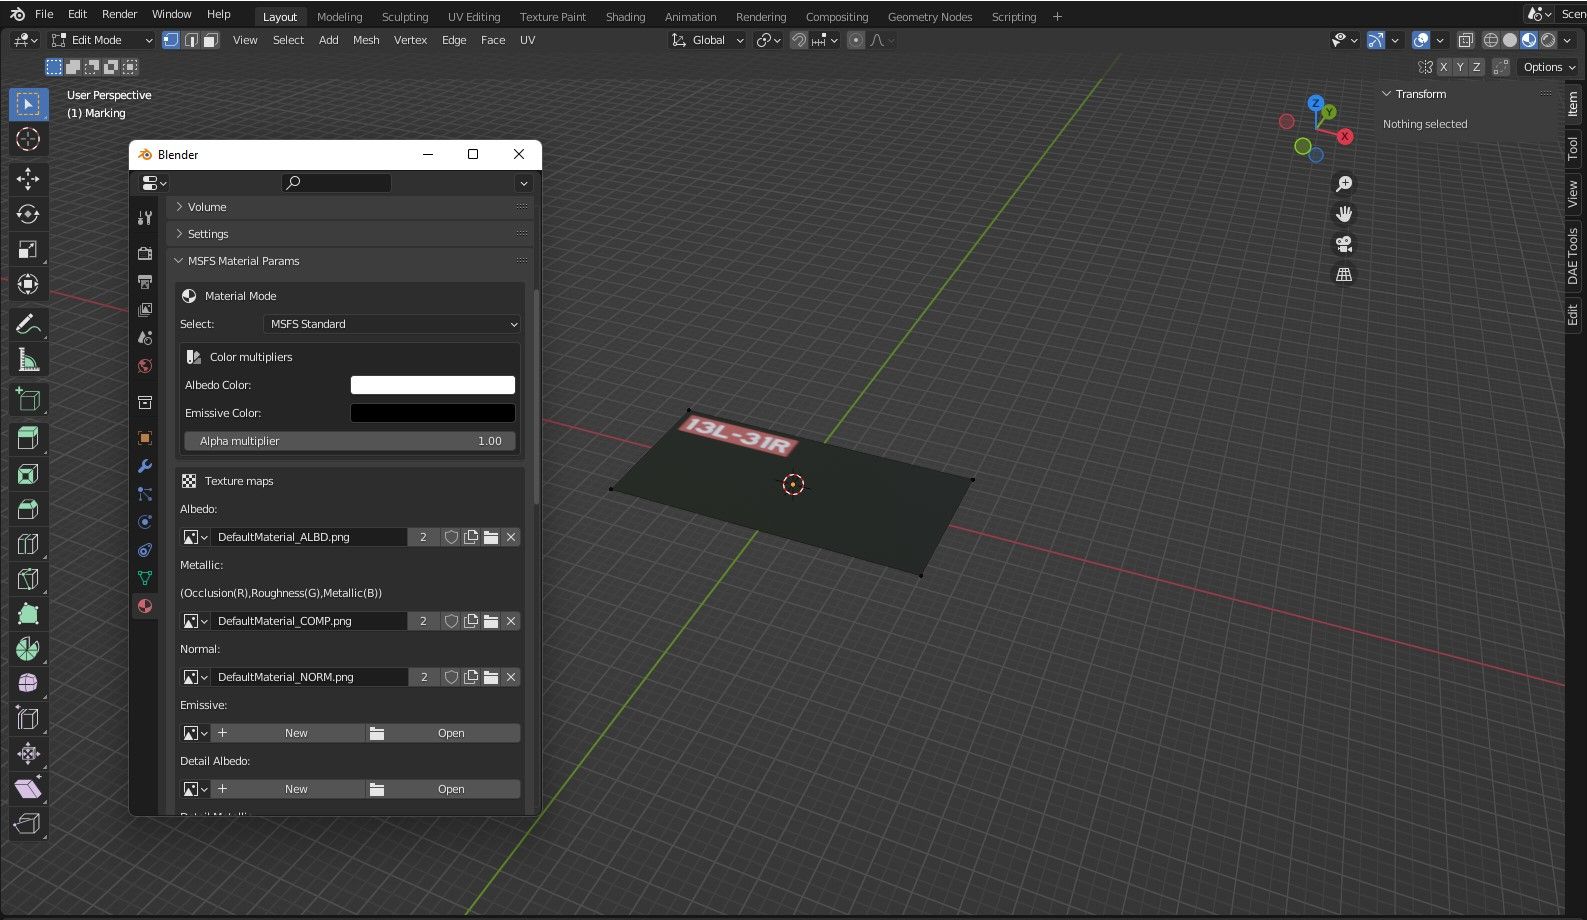
Once we have assigned the texture, UV unwrap the face, and in the UV editor, you will want to drag the corner vertices to match the corners of the marking you want from the texture so that the island is aligned perfectly over the marking.
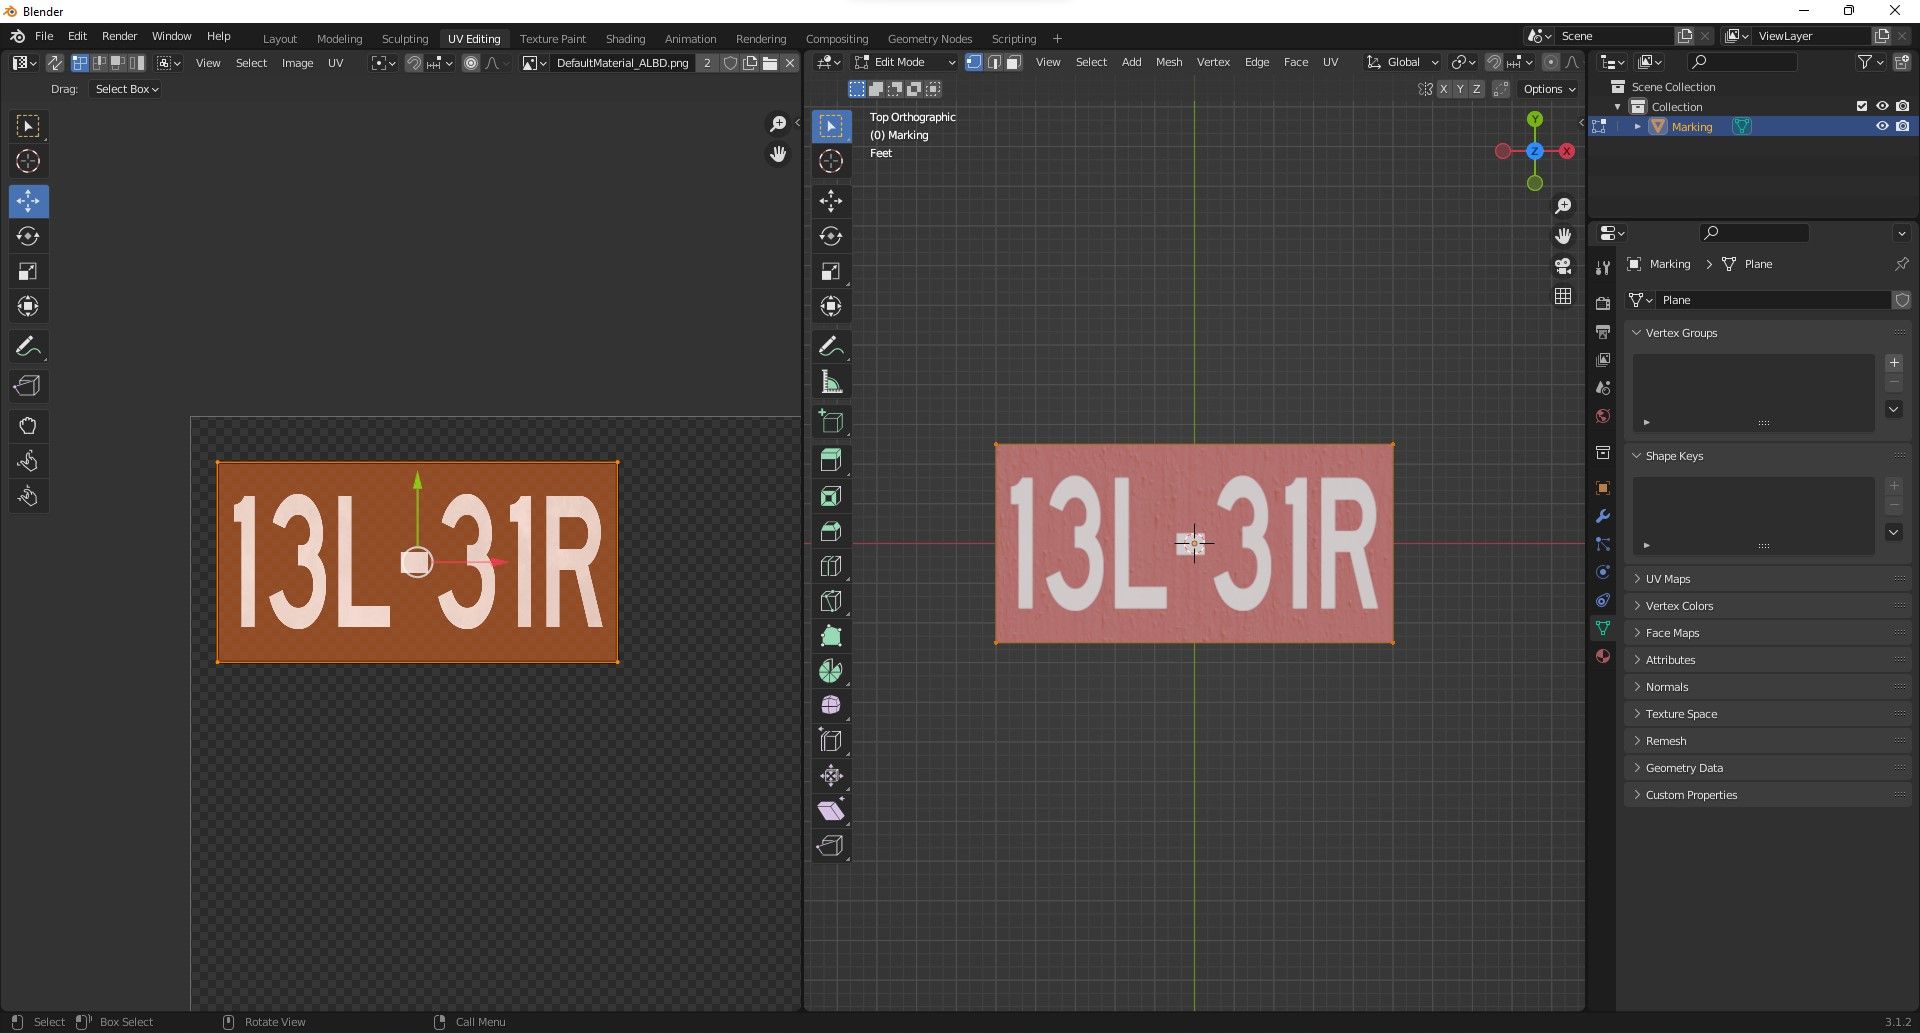
Once the UV is set up, we can return to object mode. Then, export the object to our MSFS project as a GLTF.
Placing in MSFS
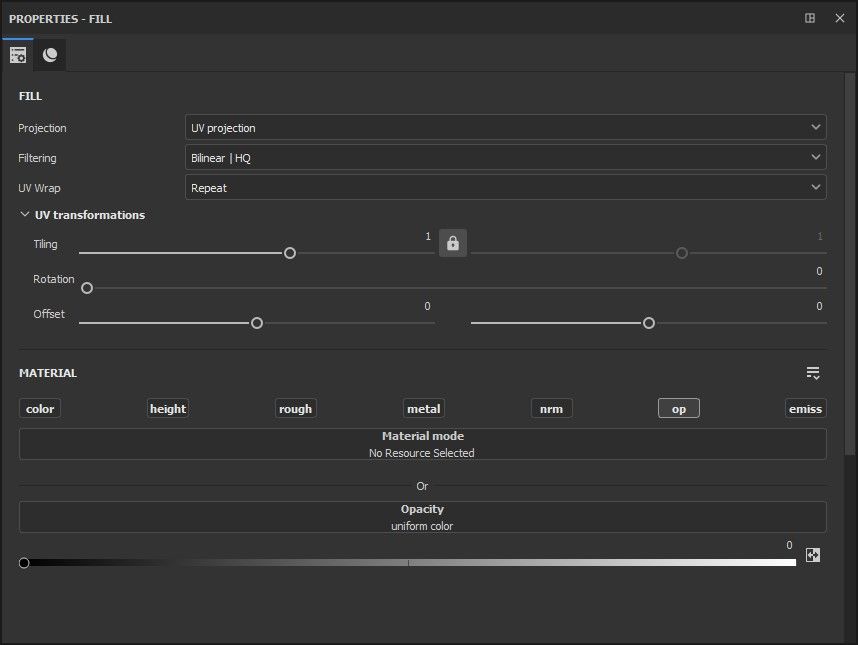
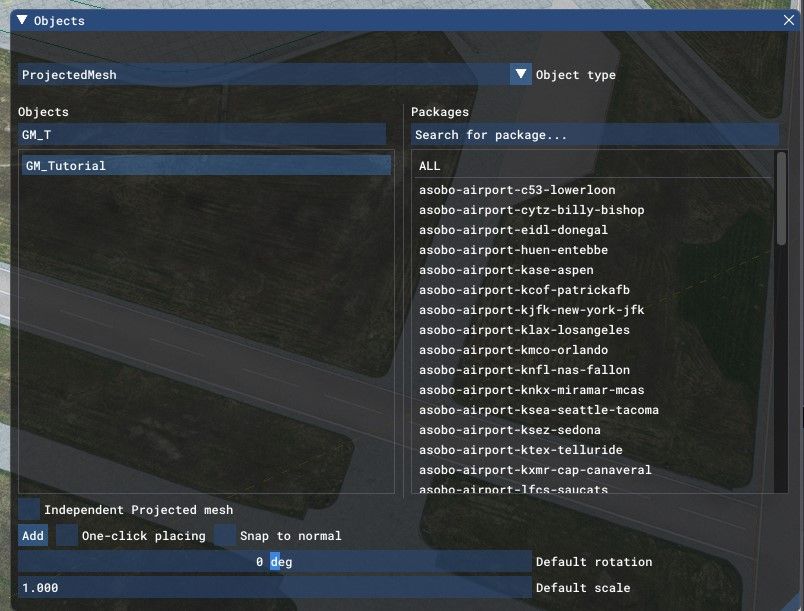
All that's left to do is place our markings in the sim. To do this, we'll use a projected mesh.
First, rebuild your project. Then once you have your scenery loaded up, go to the objects window and change the category to "Projected Mesh." Then you're going to find the mesh we exported from Blender and place it like we would a regular 3D object.
If you have aprons or other painted lines, edit the properties of the projected mesh to draw above the aprons.
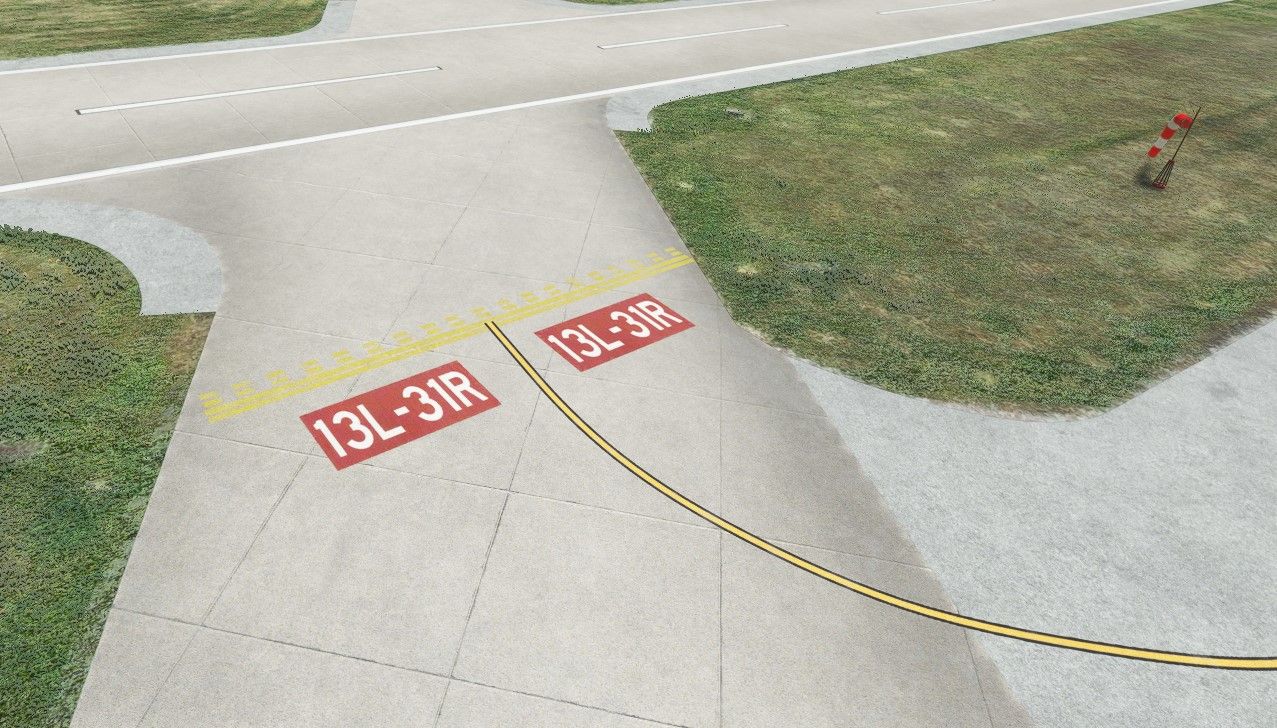
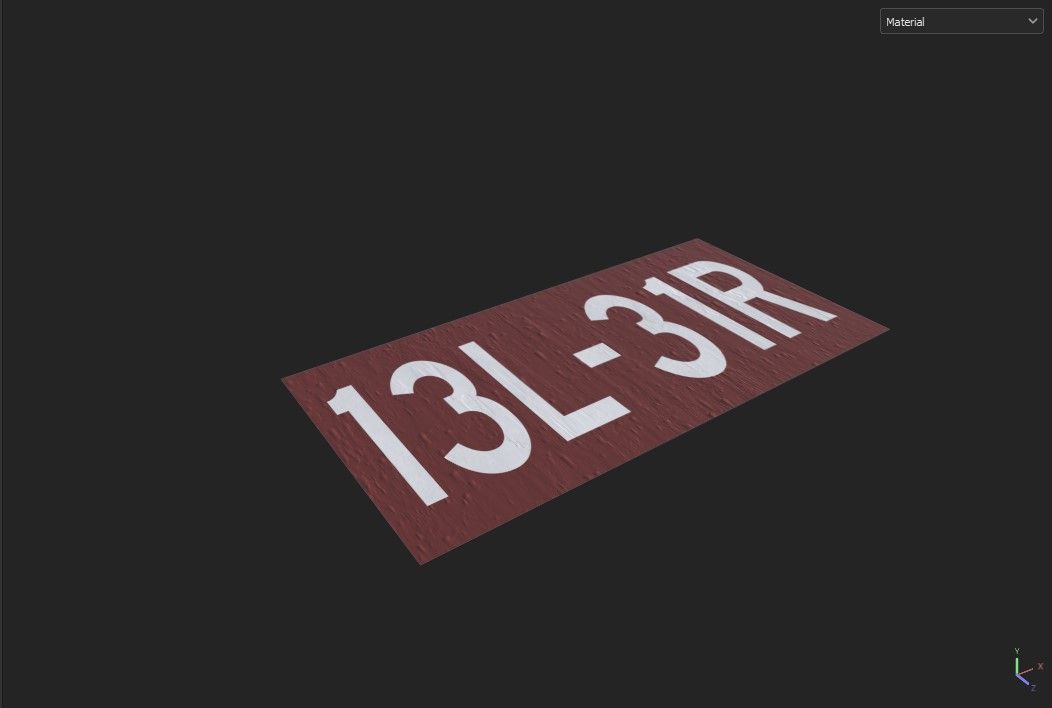
And finally, once you have the marks aligned, save your work, and then congrats, you should now have custom PBR markings in your scenery.
Feel free to join our discord, and message me if you have any questions!